Introduction
The LPKF Milling machine is a 2.5D circuit board plotter capable of creating circuit boards by milling away copper from one or two sides of a blank PCB. Blank PCBs come with copper planes covering both sides. A fiducial camera makes alignment of the board easy, and through hole plating can be applied in a separate process. 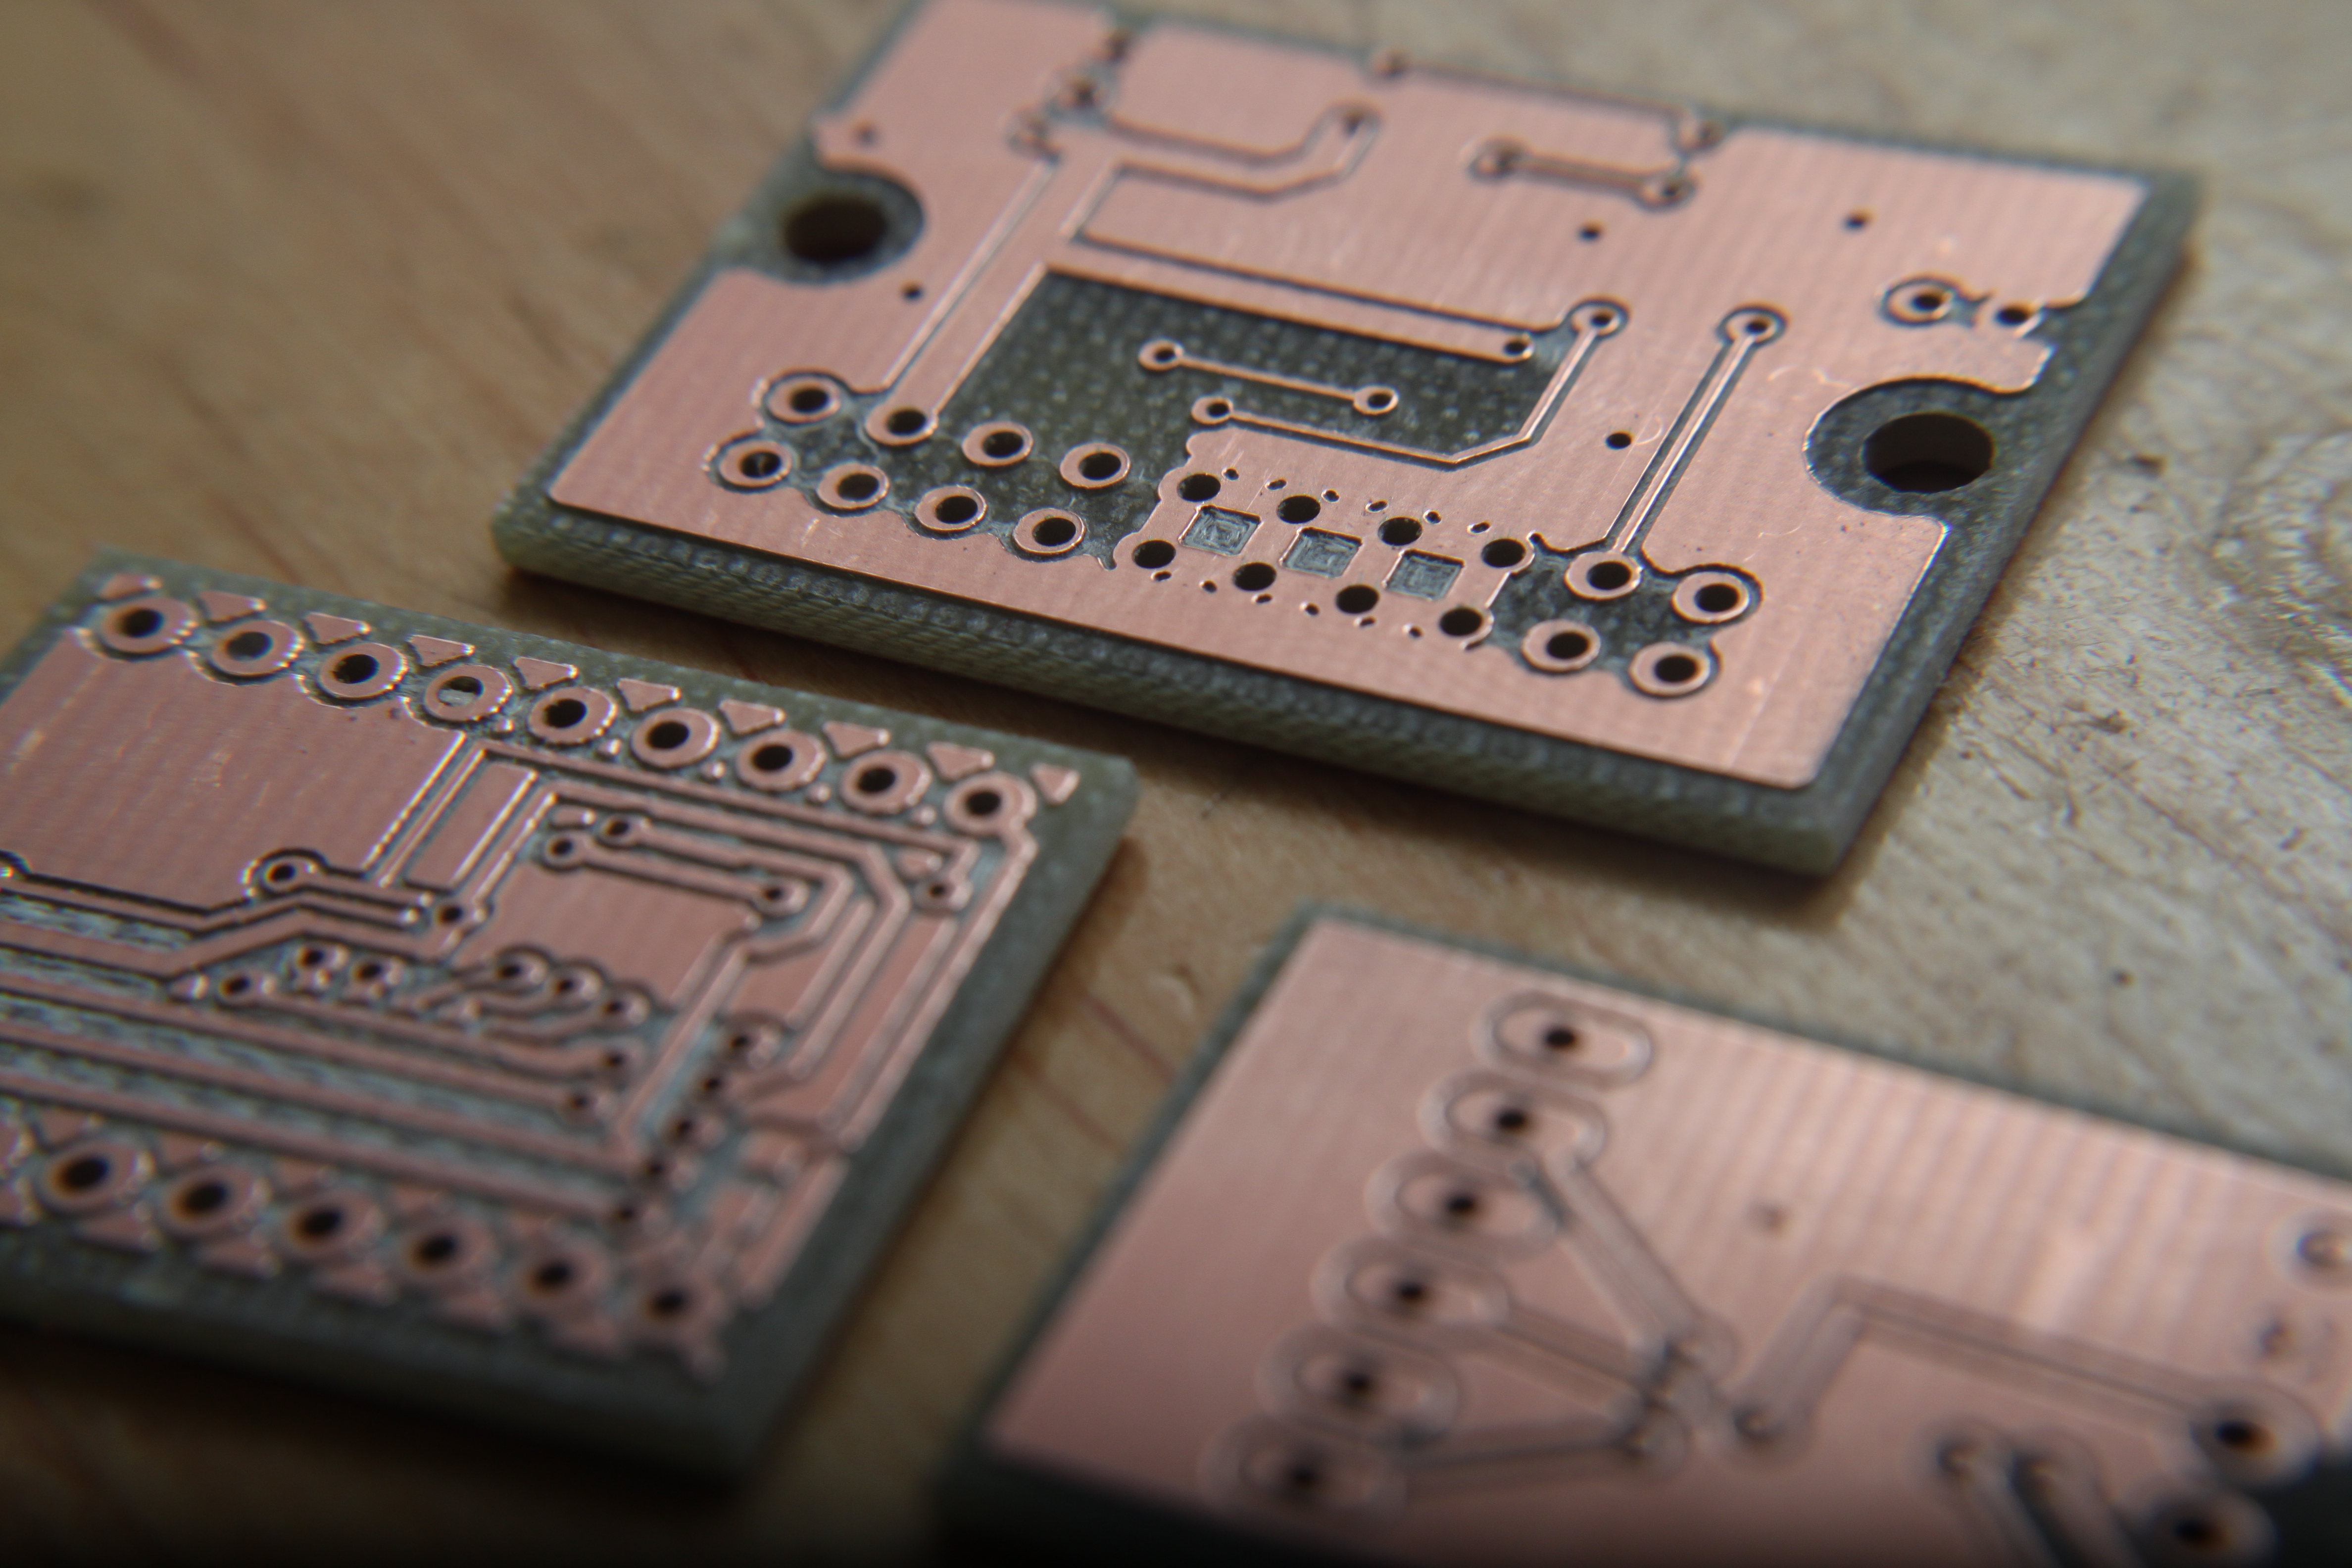
! General Guidelines
The S62 cannot apply a solder mask. Instead it mills away all copper around a trace. Lettering or silk screen layers cannot be done. To ensure your board functions, please make sure that traces and spacing are a minimum of 0.008 in (2 mm)wide and that polygons in EAGLE have an isolation value of at least 0.012 in. The smallest mill we currently have is 0.2 mm, and even hitting this width can be tricky, so plan your board accordingly. The maximum board size is 11 x 8 inches.
Preparing an Eagle Board File for the S62
Generating Gerber Files
Generating tool paths from Gerber Files
Making your board using the S62 and Board Master Software
Known Issues and Troubleshooting
* If the vacuum bag gets full it will become clogged and lose suction. When this happens, the total force holding down your PCB will decrease, and there is a risk it's position will shift in either X or Y during the milling process. The S62 can't detect when this occurs, so your PCB could easily be ruined. Change the vacuum bag when the Board Master software indicates it is necessary.
* If the white fiber-board substrate is not replaced for a long period, it will get so many ruts and grooves in it's surface that air will be able to easily escape from under your board. This can defeat the effect of the vacuum system, and result in very little holding force on your board.
* When a cutting tool becomes worn, it is no longer sharp enough to form chips as it rotates and passes over the board's surface. When this happens, the tool 'ploughs' through the copper, rather than chipping it off. This puts enough side-load on the tool to cause it to fail (brittle fracture). When this happens, you may or may not notice, and the S62 won't detect it. The broken end of the cutting tool will continue to pass over your board, which could either damage the board, or possibly miss the surface altogether.
* Occasionally, the plastic collars on the tools shift up or down along the stock of the tool. This can cause them to protrude too much or too little from the tool holders. As a result, there is a chance the tool chuck won't grip the tool stock correctly. This can lead to the tool's tip position being either not close enough to the board to touch it, or much worse, too far into the board, removing more material than you desire. In certain steps, such as through-hole drilling, it might not be apparent at all, but in other steps such as surface milling, it is undesirable. When this problem occurs, gently slide the plastic collar into position using a vise and a pair of large pliers. Be careful not to damage the tool tip or the plastic ring. Compare the final position against some new tools using a caliper, to confirm if the new position of the ring is correct. If the plastic ring cannot be repositioned successfully, discard the tool so that it does not lead to problems in the future.
* The chuck of the S62 occasionally fails to grip the tool firmly. When it is not gripped firmly, it will slide up into the chuck instead of cutting into the board when the S62 lowers its z-axis. When this happens, the tool can scratch the surface of the copper, but it's won't cut properly, if at all. Lowering the z-axis using the z-axis adjustment collar may correct this problem. However in the past, most users have successfully addressed this issue by forcing the S62 to release the tool back in to it's tool holder. This is accomplished using the 'Quick Change' option of the tool pull down menu in the Board Master software. Once the tool has been released into it's holder, get the chuck to pick it back up again and resume the task. If the S62 is able to grip the shaft more firmly the second time, you'll be able to get back to cutting in the normal fashion. If this method does not work, the tool shaft may be damaged - try using another tool instead.