MEAM.Design - SolidWorks - Image Overlays
Images imported into SolidWorks once had to be of the PNG file format (not anymore...)
Using the Sketch Pictures Property Manager
Begin by creating a new sketch (or opening an existing sketch).
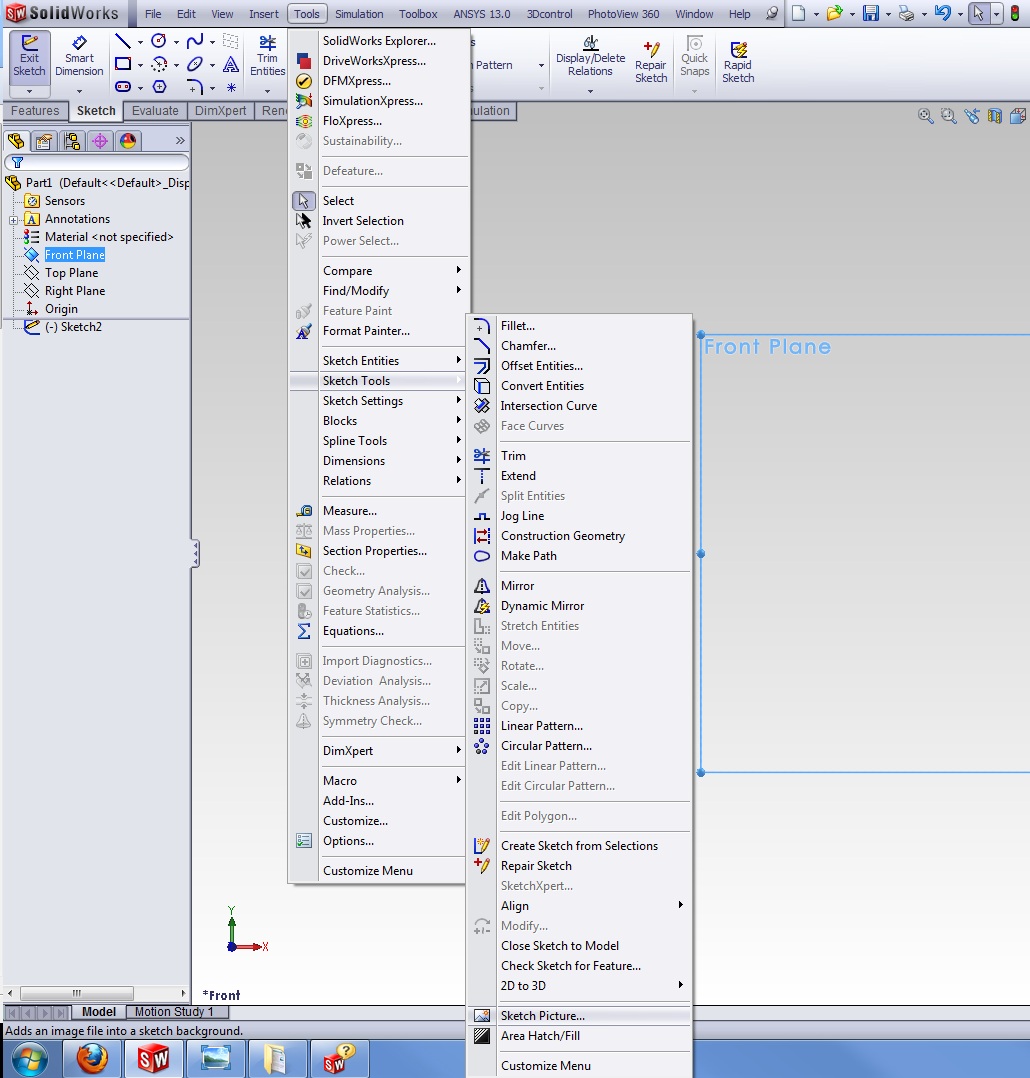
While in the "Sketch Edit" mode, click Tools > Sketch Tools > Sketch Picture
Navigate to the desired image you would like to import and click Open.
You will notice that SolidWorks will now overlay the image on your sketching environment. Using the Sketch Pictures Propert Manager (along the left column of the screen), you can:
- Precisely position the image by changing its X and Y coordinates
- Rotate the image by changing its angle
- Warp the image by stretching it in the X and Y directions
- Flip the image vertically and/or horizontally (which is often useful when laser cutting parts...)
- Change the transparency of your image
- To change transparency, under Transparency, click the bubble that says Full Image.
- Use the dropper and the slider controls to achieve the desired effect
Once you are satisfied with the image, click the green check mark in the upper left corner of the Property Manager.
You can now sketch on top of the image. As usual, when you're finished sketching, click the Exit Sketch button.
You'll notice in your Feature Tree that the picture you just inserted is nested within the sketch itself. To see this, click the small + next to the sketch containing the image. If you wish to hide the picture (so that you can see only the entities you just sketched), simply right-click on the Sketch Picture icon, and select Suppress. To make the picture visible again, right-click in the same place and select Unsuppress.