MEAM.Design - SolidWorks - Animations / Exporting/Saving Your Animation
Saving your Animation
Note - if you're planning to use the SolidWorks window image for the video output, it's a good idea to set the background to something simple - Plain White, for instance (see here for more info).
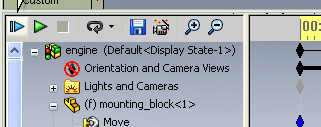
Once your animation is ready, click the icon in the animation subwindow that looks like a floppy disk, as you can see in the image above This will open the dialog box shown below:
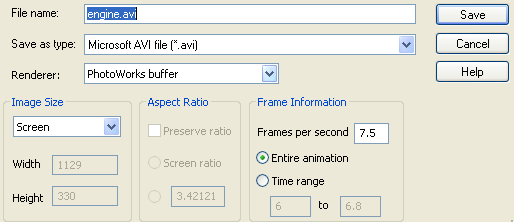
The Save Animation to File Dialog Box
Now you get to play with settings:
Save as type - The default file format is AVI, which works well for most applications.
Renderer - the default is
PhotoWorks buffer, which allows you to change the image size, as well as include any PhotoWorks properties in your animation. While this can create great looking videos, it can also be quite slow. The second option is
SolidWorks screen, and will simply take a series of screenshots of the part/assembly view which is shown above the animation subwindow (yes, this means is usually short and wide).
Image Size - if you selected the
PhotoWorks buffer renderer, you can then pick the size of the video image.
Screen will match the size of the part/assembly view which is shown above the animation subwindow, while
Custom will allow you set anything you'd like, and the various pre-defined sizes will conform to standard video dimensions. Note that larger images will take a lot longer to render.
Aspect Ratio - this is only an option of you choose to use a custom image size.
Frame Information - Here you'll set the frame rate and subsample duration:
Frames per second (FPS) - The default is 7.5, which will look okay, but choppy. For smooth playback you want upwards of 20 FPS. Most video is shot at very close to 30 FPS, while movies are usually shot at 24 FPS. Note that high framerates will take a while (sometimes hours) to render, and will result in large movie files, but the results are often worth it! Below is a comparison of three different frame rates, where you'll see that for many purposes, 10 FPS should work fine):
Time range - if you've created a long animation but only want to render a small portion, you can set the in and out times here.
Once you've got all the settings as you'd like, you can simply click the Save button, and...
The Video Compression Dialog Box
Here you're going to set how much SolidWorks should compress the video file as it's creating it. If you want the details, they're below, but here's the punchline: solid-color background (see here to set that), 10 FPS, Microsoft Video 1, 90% quality - this will look great.
Codec Comparisons:
SolidWorks Screen (673x413), 10 FPS, Full Frames (Uncompressed), 85% quality, 56MB - yeah, it looks great, but it's huge (I can't even upload it from here!). If you plan to use some other software for compression, this is a good option, otherwise, it's unnecessary.
At this point, it's worth looking at the compression quality setting:
Now, to change the background to get rid of that nastiness:
Once you click OK, you get to wait (and wait, and wait) while SolidWorks chews on your animation...

