MEAM.Design - SolidWorks - Using PDM
SolidWorks Workgroup PDM (or Product Data Management) is a system to help organize all of your SolidWorks files, and is especially useful when working on group projects. Files are stored on a central server, and beyond the fact that this is backed-up hourly, it is also possible to roll-back to previous versions of your files.
Gaining Access
Use of the PDM server is currently by request only. To get a login and project access, send an email to meam-labs@lists.seas.upenn.edu entitled "PDM request" with the following information:
- your name
- your PennKey (the part before the @ sign in your email address)
- project name (either a new project or match an existing project if you are joining a group)
Enabling PDM
Depending upon the setup of the machine you are using, you may or may have PDM running by default. If the below options for logging in are not available, go to the "Tools" menu, and select "Add ins...". Next, click the checkbox to the left of "SolidWorks Workgroup PDM 2014", then click "Ok". After a short duration, you should have the ability to log in via the second method below.
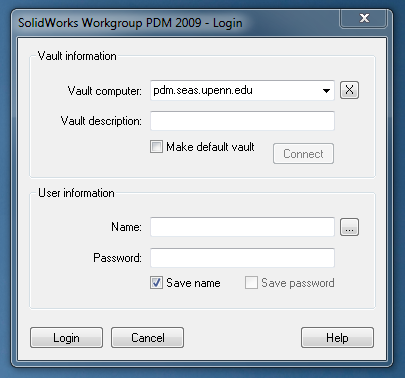
Logging In when you start SolidWorks
Depending upon the lab you are working in, you may be faced with the dialog box shown to the right when you first start SolidWorks:
- If it isn't already set, you will need to enter the name of the vault computer as pdm.seas.upenn.edu.
- Next, enter your username (or select it from the list by clicking on the "..." button) and enter your password.
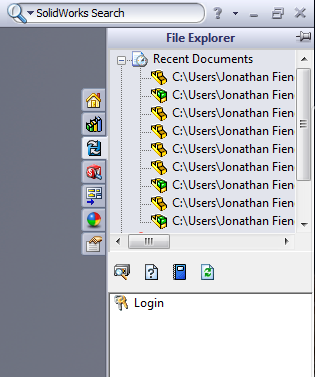
Logging In when you are already in SolidWorks
If you are already in SolidWorks and want to log into the PDM server:
- click on the button shown in the image to the right, which will open up the File Explorer.
- click on the word "Login" in the lower pane, then enter the server name (pdm.seas.upenn.edu) as well as your username and password.
If you do not see the PDM icon (blue square with circulating gray arrows), you may need to enable the Solidworks PDM Add-in:
- At the Solidworks top menu bar, click on Tools -> Add-ins...
- Under Solidworks Premium Add-ins, there should be "Solidworks Workgroup PDM 2009"
- Check both the left and right checkboxes for this add-in, then click OK
- Wait a second for the add-in to initialize and a PDM login window should pop up, or at least the PDM icon button/tab should be at the right of Solidworks window and you can login through there
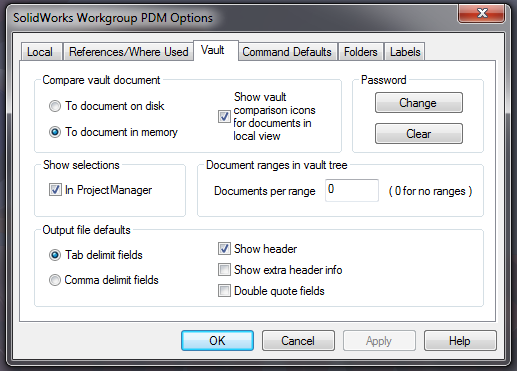
Changing your password, setting your local folder, and other options
This is the first thing you must do when you either start using PDM for the first time, or whenever you store local copies of the files in your project. Note that you will never be working on the server copy of a SolidWorks document, but rather you will check out copies to your local machine, work with them, then check them back in, as described below.
- right click on the word "Vault" in the File Explorer, then select "SolidWorks Workgroup PDM Options" - this will bring up the dialog box shown to the right
- change to the "Vault" tab, and click the "Change" button under "Password", then enter your new password.
- now, change to the "Folders" tab, select the "Use folder:" radiobutton, then Browse for where you want to keep local copies of your files.
- lastly, change to the "Command Defaults" tab, and deselect the "Retain Ownership" option under Check In.
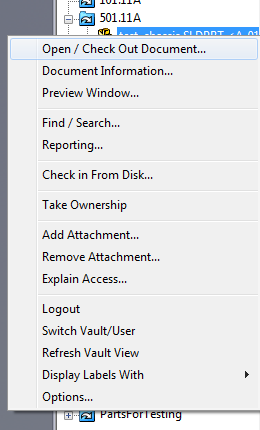
Checking out a document from the server
When you want to open (or "check out") a part or assembly from the PDM server, right-click on the item, and you will see the menu to the right. From this, select "Open / Check-Out Document..."
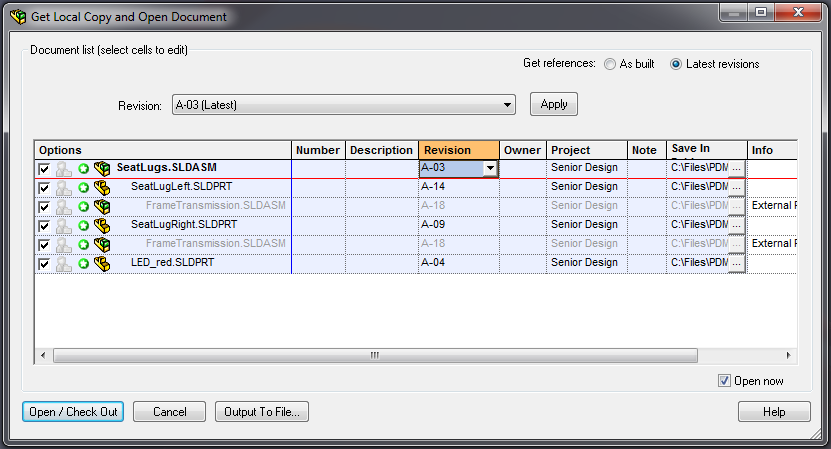
This will bring up the "Get Local Copy and Open Document" dialog box show to the right.
Note that if you are checking-out an assembly, the system will automatically bring along all of the required parts. On each line, there are a number of controls that you can modify.
- The checkbox toggles whether or not you wish to open a particular part.
- The small person-shaped icon controls whether you want to take ownership (see below for details on this) when checking out the part.
- To back up to something other than the most recent revision, click on the Revision value and select a previous version from the drop down menu.
One thing to watch out for is discrepancy between your local copy and the copy on the server. If the system recognizes that your local copy is either the same or older, you will see a green icon in the row, like this:

If, however, the system finds that your local copy is newer than that which you are trying to check out from the server, it will present you with a red icon, like this:

and you will also have to confirm that you want to overwrite the newer version after you click the "Check Out" button.
Saving and Checking in a document
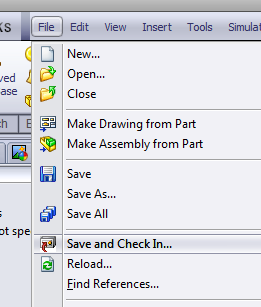
When you save a part, it ONLY updates your LOCAL copy. When you want to check your document back into the PDM server, you need to select "Save and Check In..." from the File menu, as shown to the right.
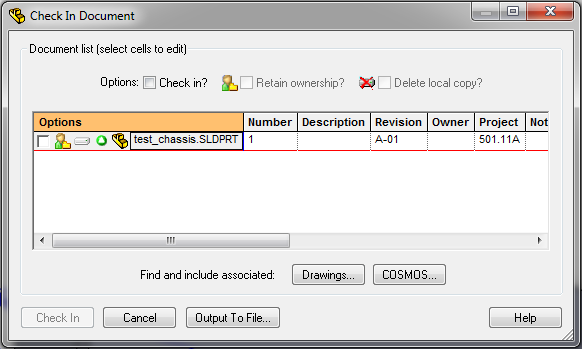
This will bring up the "Check In Document" dialog box.
- For each item that you want to check in, select the checkbox in the left-most column of the box, and you will be presented with a message telling you that you need to take ownership of the file to check it in. Say okay to this, and you will see that the box will be checked. Note: If you de-selected the option to retain ownership on check in (see above), then you should see that the "Retain Ownership" checkbox is not selected. This will allow others to access the part, and is generally recommended. For more details on ownership, see below.
- Assuming that you've made any changes to the part, you should see that the revision number has been increased. If you want to signify a major update, you can drop down the revision box and update the letter as well.
- Now, click the "Check In" button to commit the files back to the PDM server.
Using ownership to control file access
Using ownership makes it so that you can prevent other people from accessing a part for some reason. To take ownership of a part, right click on it, and select "Take Ownership". Once you do this, you should see a pink icon atop the standard part icon, like this:

In this state, nobody else will be able to access this part. To release ownership, right click on it, and select "Release Ownership".
If somebody else has ownership of a part, you will see a blue-green icon atop the part icon, like this:

And you will not be able to access it.
It is possible to control the default ownership behavior via the options (right click on the word "Vault" in the File Explorer, then select "SolidWorks Workgroup PDM Options").
Creating sub-projects
To help organize your work, you can create sub-projects within your main project. To do this, right click on your main project folder and select "Create SubProject...".