MEAM.Design - SolidCAM - 2.5D Milling - Profile
Profile is the operation to use when you need to create a outer profile from your stock. It is many times the first operation done on a part. First select Profile from the operations list.
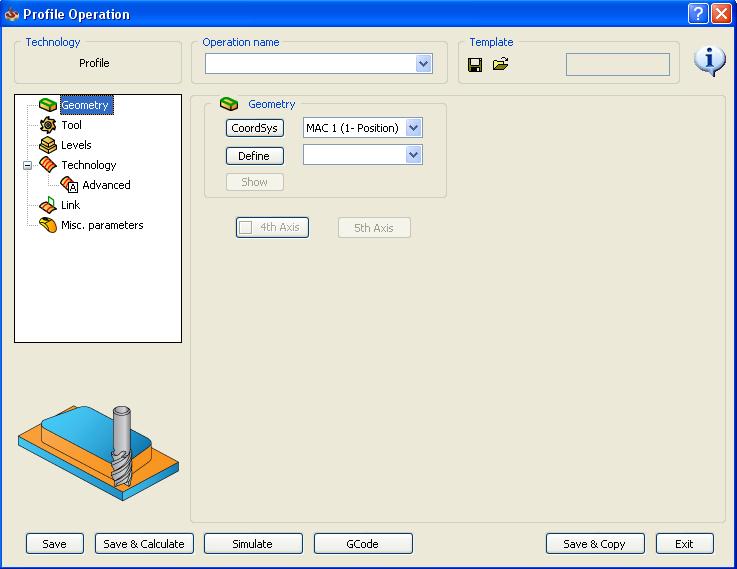
This is the screen you will see when you begin a profile operation. Assuming you have set up your coordinate system for the part, you will not have to change it. You will however have to click "Define"
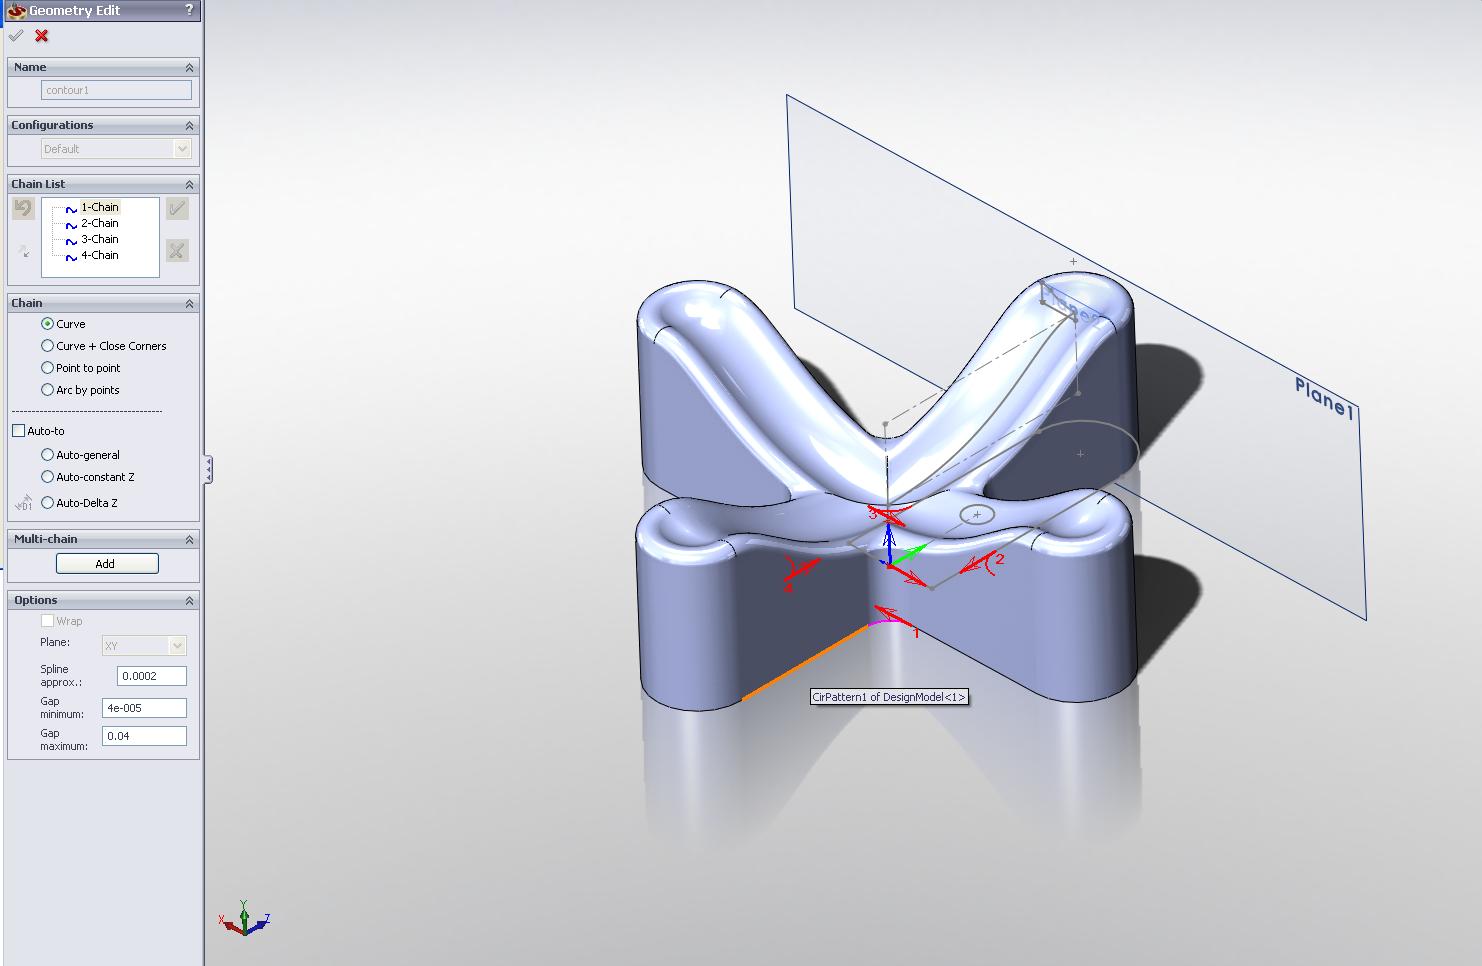
This is the screen you will see to define your geometry. Select the contour(s) that you are trying to profile. If you have multiple disconnected contours, you will have to add them as "chains". If your profile is all the same height, "Auto Delta Z" can be a great tool to automatically select your whole contour.
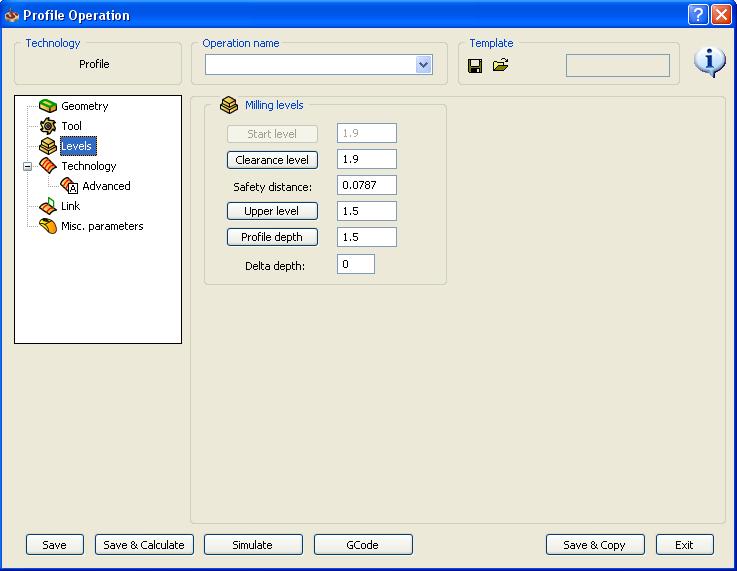
After selecting your contours, click the green Check and move on to Levels. It will generally auto-assign good values to these fields. However, make sure that the clearance level is higher than your stock. Also, if you would like to cut into your fixture, add ~.002 to your profile depth.
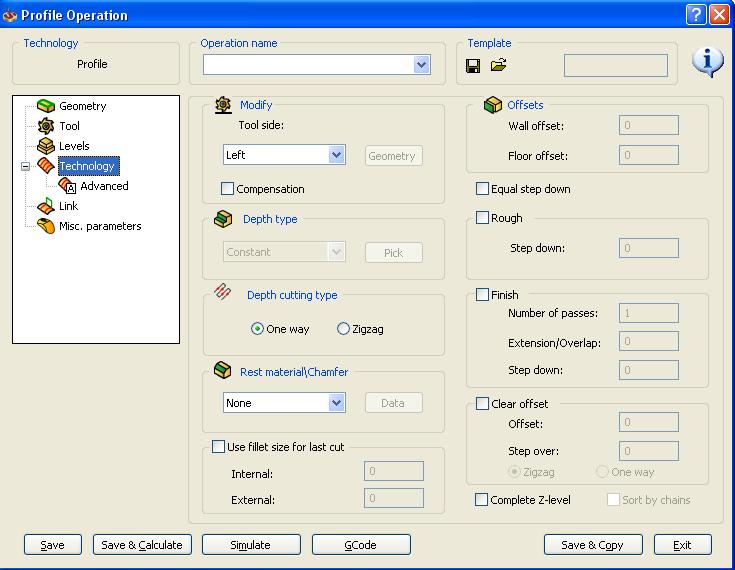
Move on to technology. first make sure your tool is on the correct side of the profile. Simply click on geometry and make sure that the tool is not inside the part. Next, select Constant for Depth type if you are using an end mill. The rest of the options are self-explanatory. However, pay attention to Offsets, Rough, and Finish. The offsets you set will be where the rough pass ends. A good number is .01 for each offset. Next select rough and set the step size to how big of a pass you want to make in the Z direction each pass. For a 1/2" end mill, a good pass is .125". Lastly, select finish to do a finishing pass after the rough passes. 1 finish pass in generally enough. The rest of the options a generally unnecessary, but easy to understand.