MEAM.Design - SolidWorks - Linear Pattern
Created in either one or two directions, linear patterns are a great way to create repeating geometries. For instance, let's say we want to create a grid of holes in the part shown below:
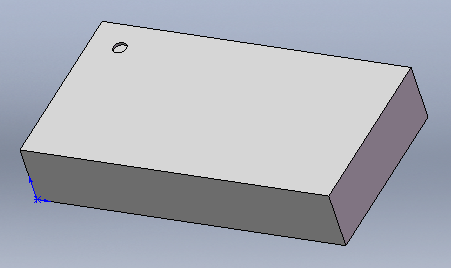
Getting started
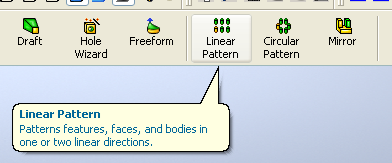
We need to start by creating the first feature, which can only contain the elements we want to pattern (in this case, the hole was created as a second feature after the block). You can either pre-select the geometry you want to pattern, or select it later. Now, we click on the Linear Pattern button (available when in Feature mode), or select Insert > Pattern/Mirror > Linear Pattern.
Which brings up a rather-long control box. The starting point in this control box is the Direction 1 section, but things can get a bit confused here because you can actually set either the direction for patterning or the objects to pattern depending upon what you click. If you select an edge or axis, it will fill in the Direction 1 box, while selecting a full feature will fill in the Feature box. The full control box is shown below (note - it's split just to save space).
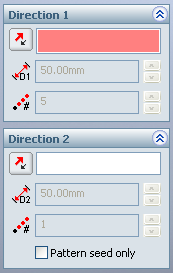
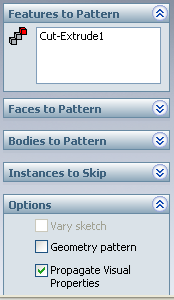
To be able to dynamically visualize the results of the pattern, you should select the feature (or features) to pattern before selecting the directions. You can force the control box to register features by selecting the Features to Pattern selection box first.
Creating a 1-d pattern
Once you've selected the feature(s) to pattern, it's time to tell SolidWorks how to pattern it/them. The Direction 1 setting, which accepts edges or axes, is used to indicate the direction along which you'd like to create the linear pattern.
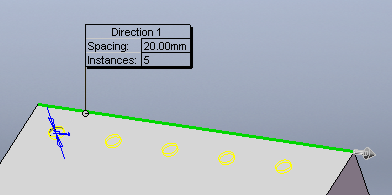
(Note - if you didn't select the features yet, you won't see any preview elements)
Within each direction box you can control the direction, spacing, and number of elements (note - the quantity includes the existing object). You can also adjust the spacing and quantity by clicking on the values shown in the modeling window.
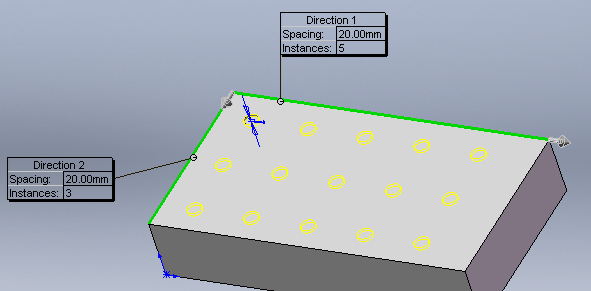
Creating a 2-d array
The Direction 2 setting, which also accepts edges or axes, is used to create a 2d pattern by patterning the Direction 1 pattern.
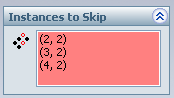
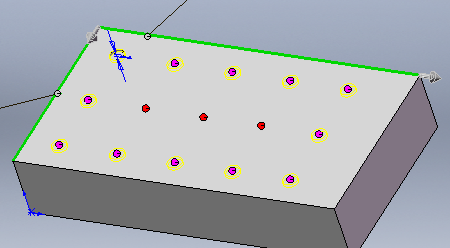
Skipping Instances
Expanding the Instances to Skip control section and clicking into the selection box will allow you to toggle the inclusion of elements in your pattern. This is quite useful when you need to make a grid of features, but need to leave certain elements out. Once you've clicked into the Instances to Skip selection box, you'll see purple markers appear over all the instances in the pattern. Clicking on one of these purple markers with your mouse will remove the instance and turn the marker red. To bring the instance back, simply click on the marker again.