Teuvo
This page describes how to make belt/chain between two or more wheels/gears/oulleys.
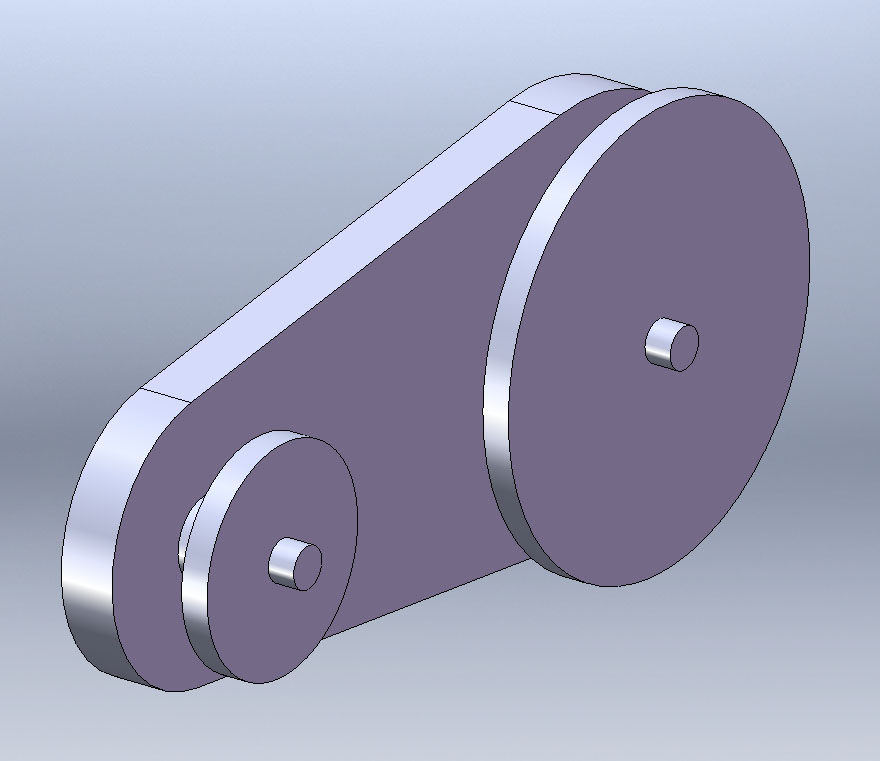
First of all, you need to have a assembly file, where you have your wheels/gears/pulleys.
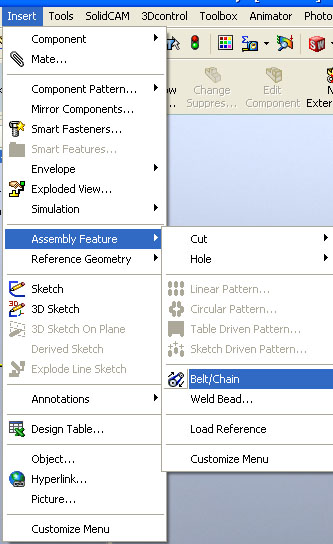
Go to Insert, Assembly Feature and then Belt/Chain.
The next windows pops up.
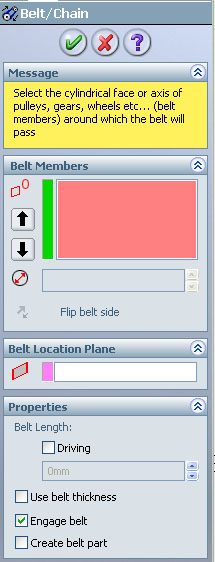
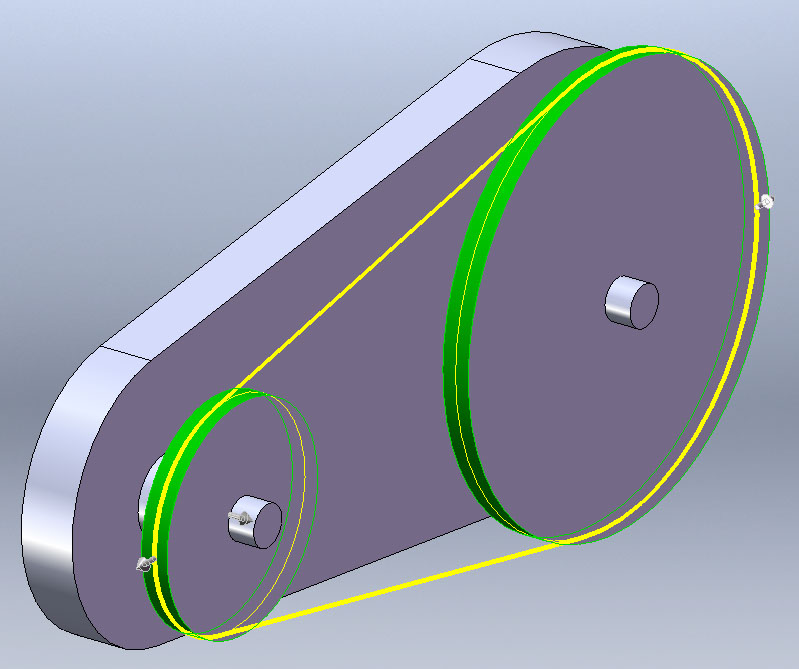
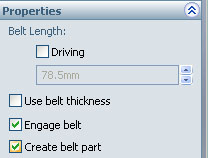
You need to select your wheels/gears/pulleys as Belt members. After you've selected the belt members, you can define the side of your belt/chain, sometimes the initial belt can intersect itself and that's not usually desired. If you have pulleys, you can make your belt/chain Driving.
You can change belt thickness as well!
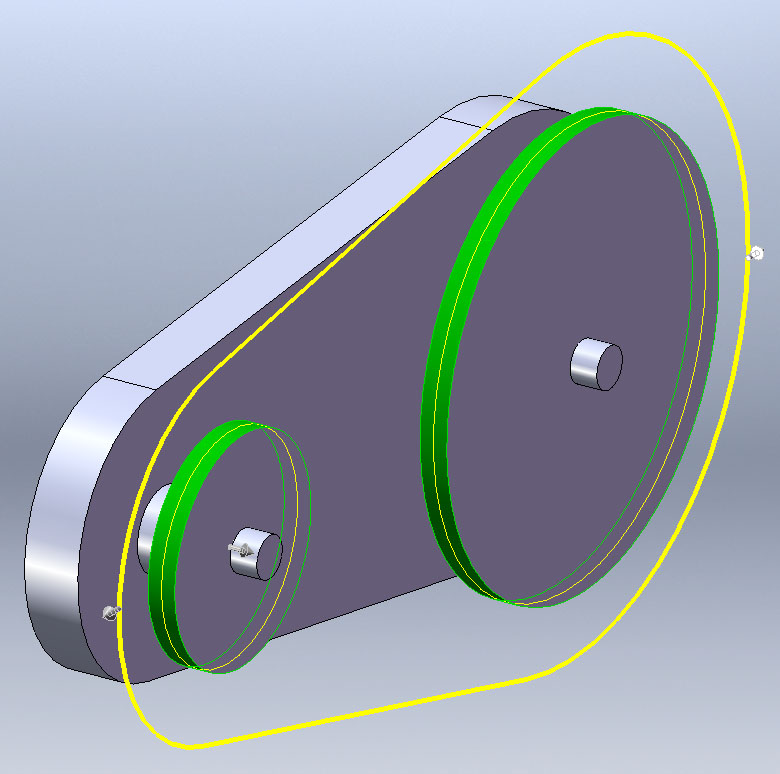
Remember to Create belt part (= saves the belt as a file)!
After you've finished your belt, it is only a sketch in your assembly, to make it a real 3d belt, go to Belt from the design tree and edit the part.
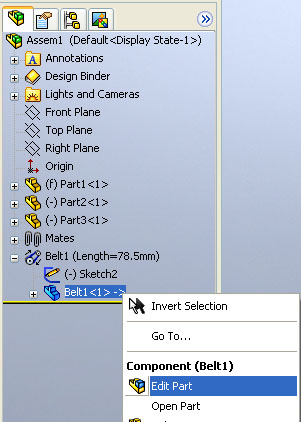
And then just do Extrusion and your belt will be finished!
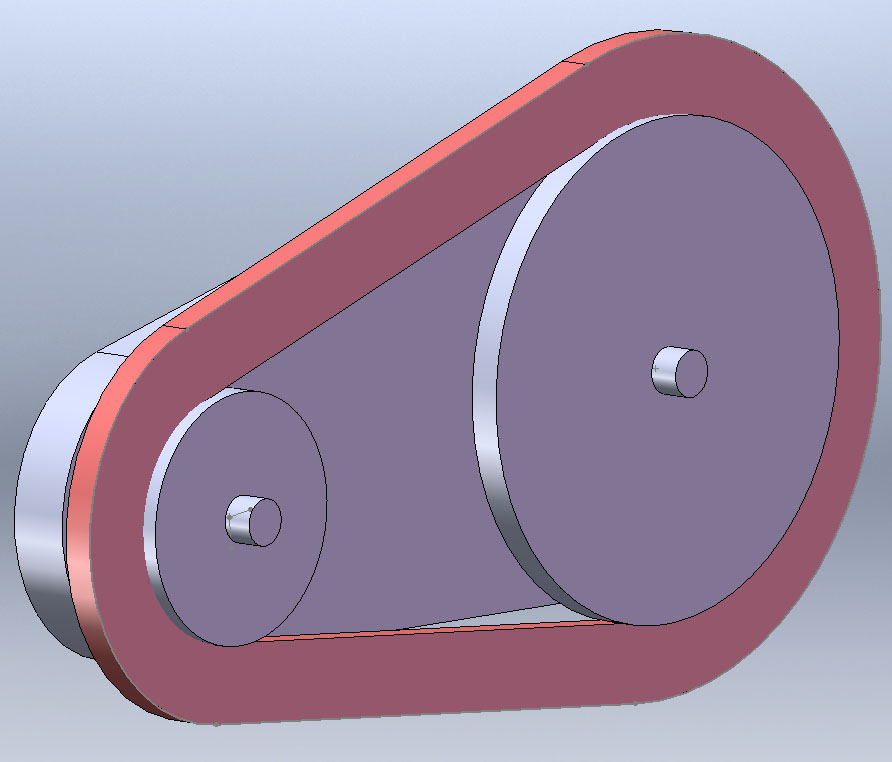
Belt feature can be used to determine the belt length in a system of multiple wheels/gear/pulleys. Note, you can make your own belt look much more cooler than the one shown in this example :)