MEAM.Design - Laser Cutting - Cutting Your Part
Set the Z axis origin
For optimal cut quality, you must ensure that the laser is properly focused at the surface of the material to be cut.
Since you may not know how thick the last material was, you should make sure the laser bed is empty (i.e. - DO NOT PLACE YOUR MATERIAL IN THE LASER YET!)
1. Press the Z button on the laser console and the laser head will move to a point near the middle of the bed.
2. Place your material below the laser head (if the material will not clear the bottom of the laser head, move the table down by pressing the down arrow closest to the LCD screen).
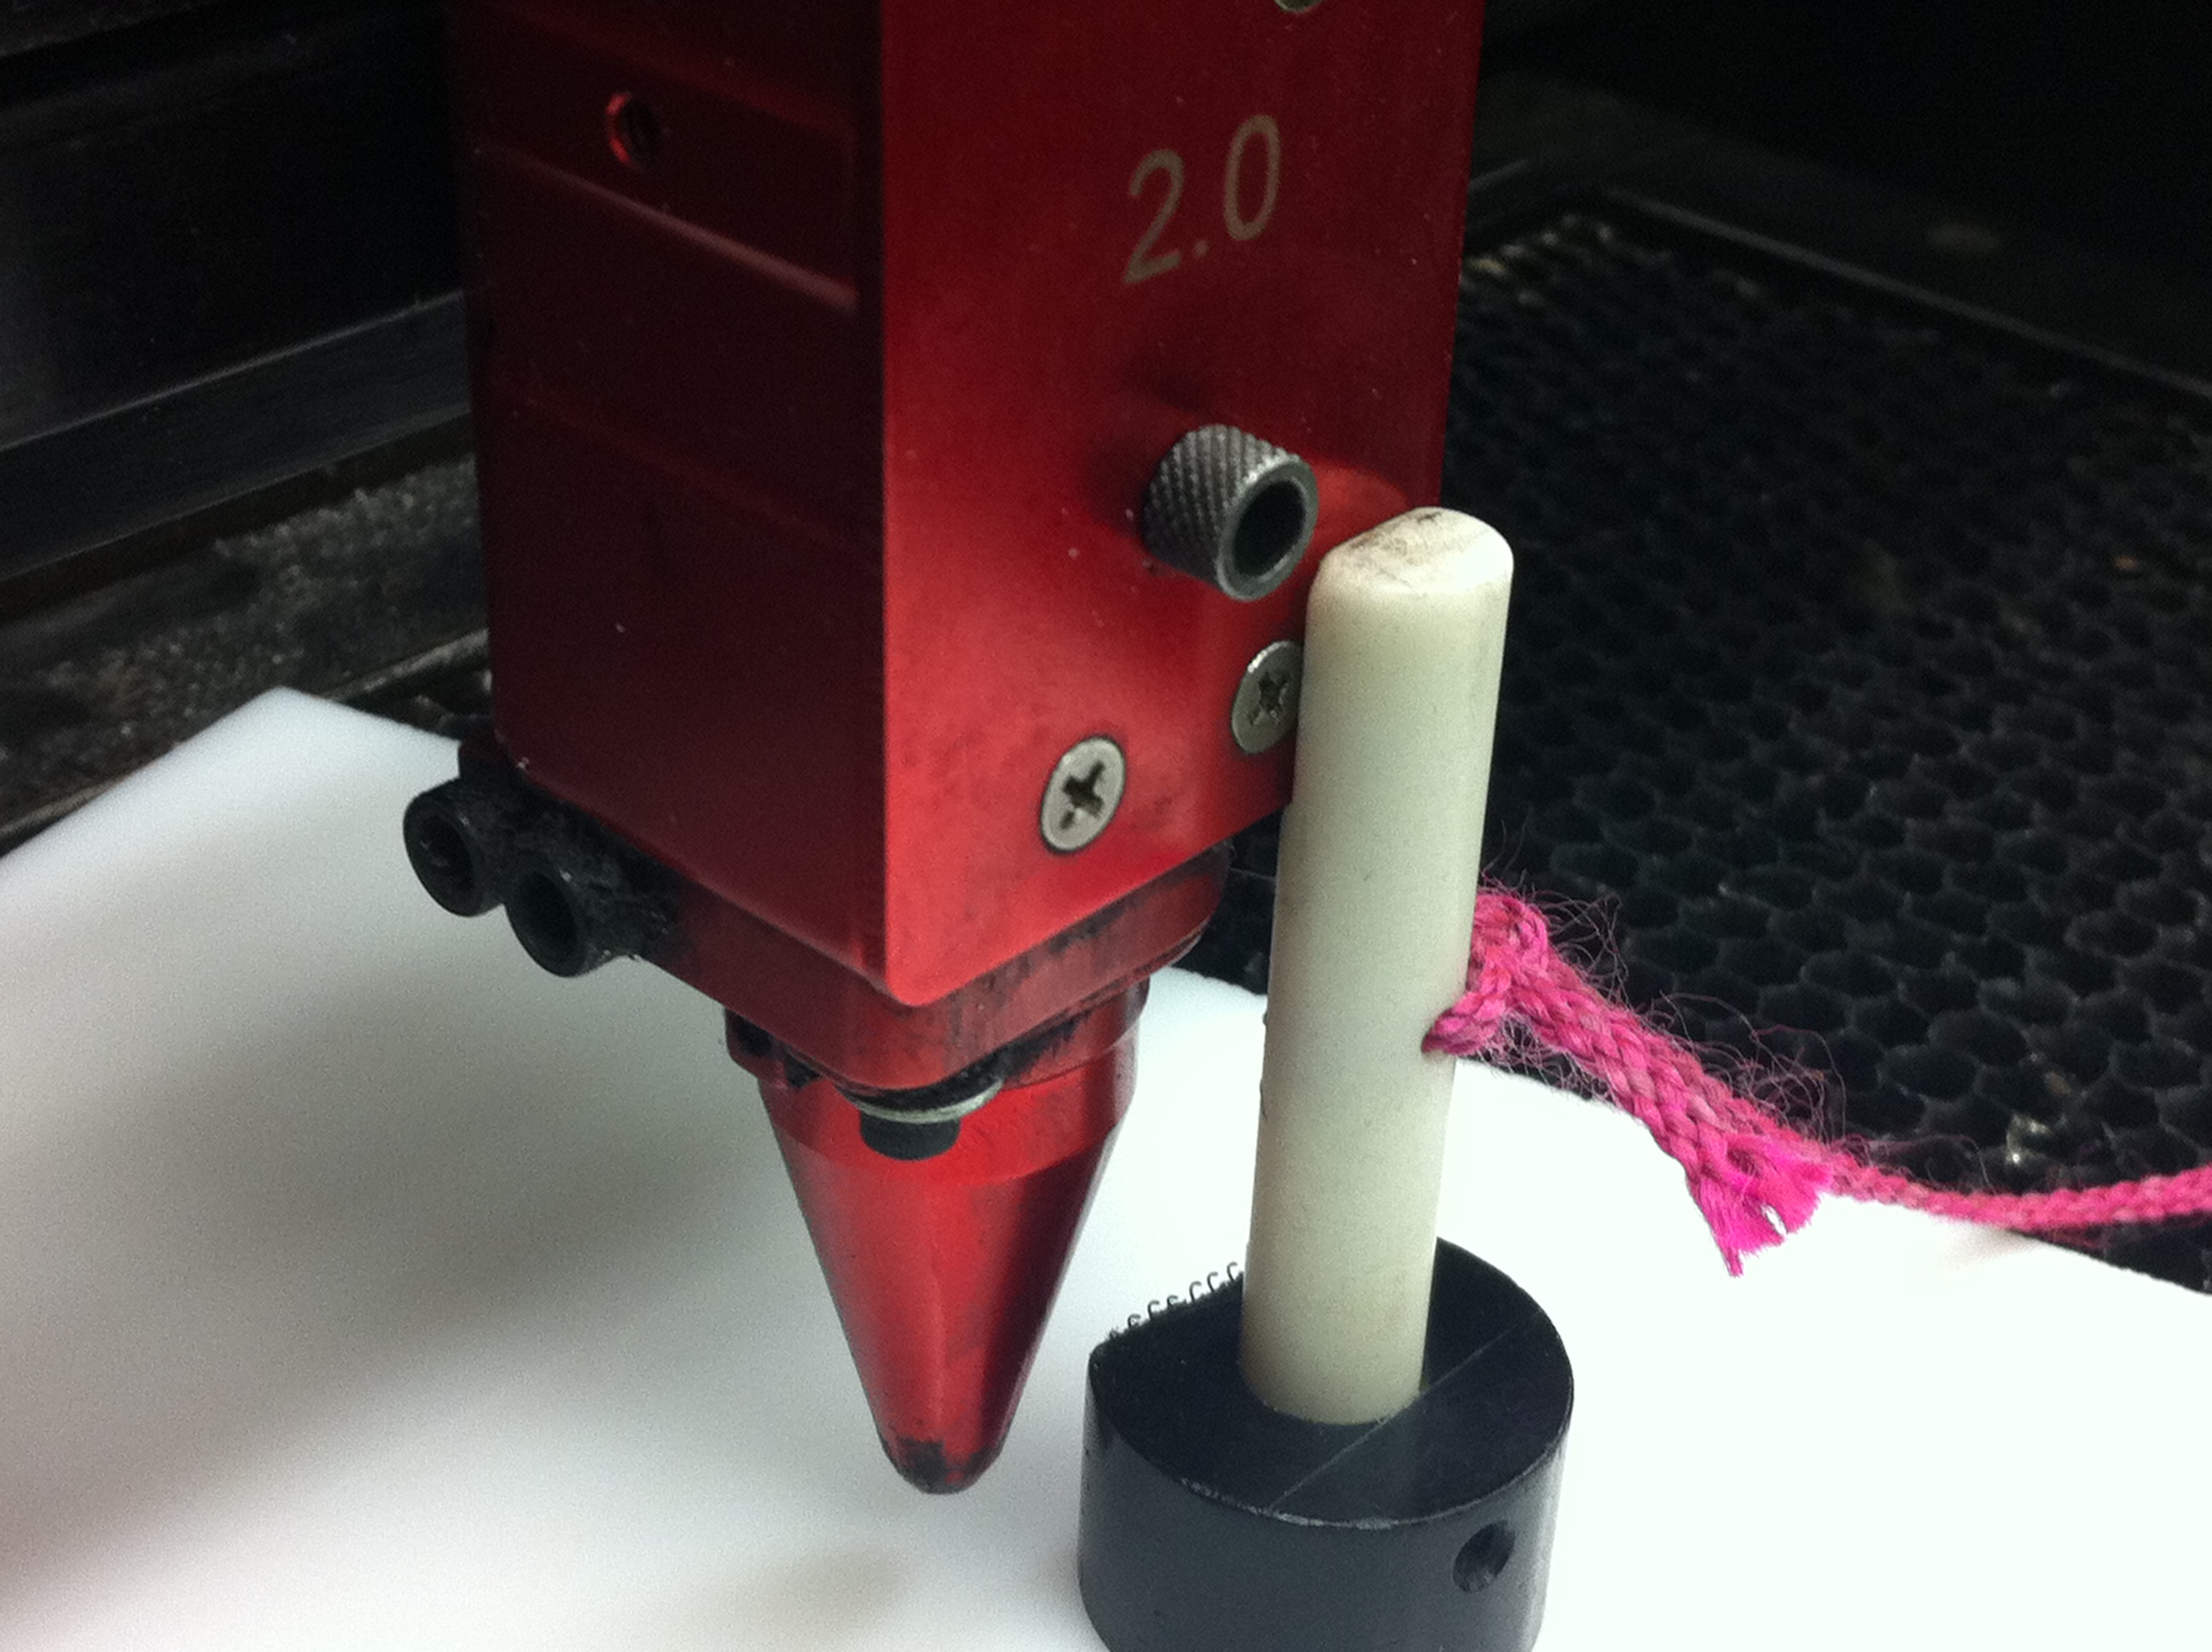
3. Place the focus tool on top of the material so it sits just next to the laser head.
4. When you press the arrow keys closest to the LCD screen, the bed will move up or down relatively quickly. Once you get close to the configuration shown in the image to the right, you will want to press the Select button once to move into fine mode. Continue adjusting the bed height until the edge of the laser head body aligns well with the ledge on the focus tool.
5. Remove the focus tool.
6. Press the Z button again to finish setting the focus.
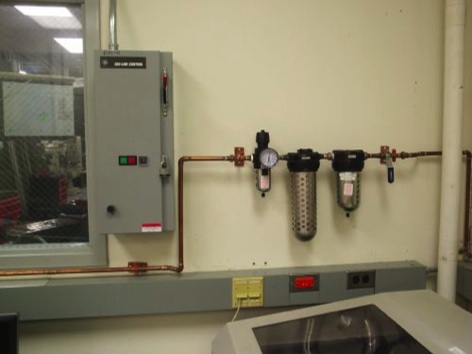
Turn on the air supply and exhaust fan
1. First, make sure the ball valve on the air line is in the on position (the valve lever must be aligned parallel to the pipe)
2. Turn on the exhaust fan by pressing the green buttton on the large gray box. It should now get rather loud.
Test and cut your part
1. Press the NEXT FILE button on the laser console to verify that your file has downloaded correctly.
2. To test your cutting path before actually cutting your material, leave the top open on the laser system. Press the green START button on the laser console. A low-power red laser will show you where the laser will cut. If you're satisfied with the test cut before it finishes, you can press the Pause button (though it may not respond for quite a while) to end the trial cut.
3. When you're ready to begin cutting, close the top of the laser and press the START button.
4. When you are finished, turn off the exhaust fan, and turn off the laser if you are the last person using the machine.
Notes for improved cutting performance
When cutting plastics, we typically remove any paper backing from the top surface, but leave it on the bottom to prevent scorch marks.
You may want to put your material on top of metal washers or cover the back of your material with adhesive backed paper to prevent damage to the underside of your parts.
If you're having a hard time pausing the machine during a trial cut, you can try quickly closing and re-opening the lid, but note that you may end up making a small cut in your material when you do this.
The order of operations is a bit of a mystery, and does not seem to be controllable.
Never, never change the origin of the machine!