MEAM.Design - SAAST - A1: Laser-Cut Luggage Tags
To be completed by the start class on Tuesday, July 7th, this task will help you gain familiarity with SolidWorks, DWGeditor, and the laser cutter as you create a personalized luggage tag.
Laser Training
First, to be able to use the lasers, you must watch the three videos on this page http://medesign.seas.upenn.edu/index.php/Guides/LaserTraining and then take the quiz here: https://docs.google.com/forms/d/1EEsUmX7RgTrHVcj-_sJVdtqlLZEPbGX8S_lpPRbdB6k/viewform?usp=send_form (Do not take the quiz on the page with the videos)
Supplies
You will receive a 2.5"x4.5" square of 1/4" thick PMMA (Polymethyl Methacrylate, commonly known as Acrylic or Plexiglass, see Wikipedia for more information about this very useful plastic).
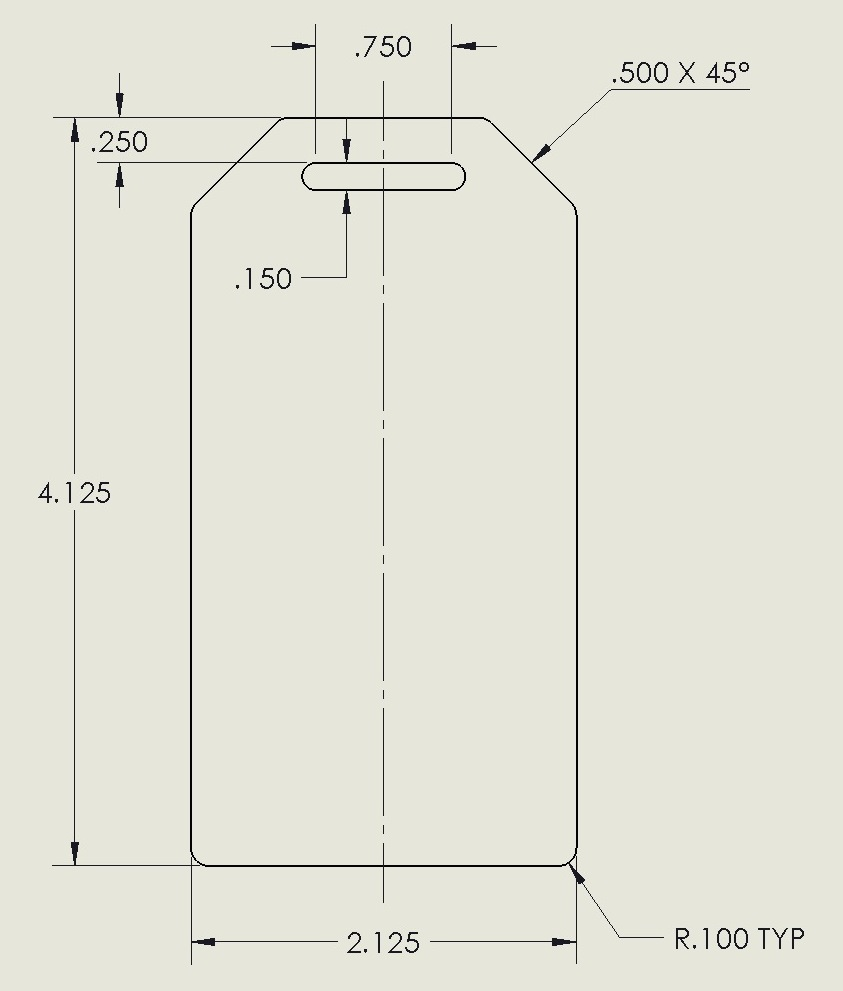
Exterior Definition
Below you will find an engineering drawing of the tag that you must create. Create a new part in SolidWorks and match the dimensions of the drawing below, make sure you get it correct or your luggage tag won't fit its strap!
After you have created the part file and defined the exterior shape, you will need to customize the interior of your luggage tag.
Interior Definition
You will need to design the interior of your luggage tag on your own. Your name must be etched somewhere.
Luggage tags also typically have contact information such as address, phone number, email, and company logo.
Be creative!
Requirements: At least one vector etch and one raster etch.
Exporting
When you are ready to export your file make sure:
You are using inches
You export as a DWG
Select TrueType under the fonts pulldown in the options menu when you save the DWG
Using the Laser Cutter
A TA must be present whenever you use the laser cutter.